If you find that the chlorophyl in edibles upsets your stomach, or if you just don't like the taste of weed in your edibles, weed washing might be just the thing for you.....
Weed Wash: For Better Tasting Edibles
I finally got around to answering 10’s of 10’s of comments this morning (41!) and realized in the end that 10 of those didn’t go through. Boo… Hiss…
But three out of those ten commenters really wanted to know how to get some of the “weed” taste out of your weed oil. I just so happen to have been working on a tutorial for this that I wrapped up yesterday.
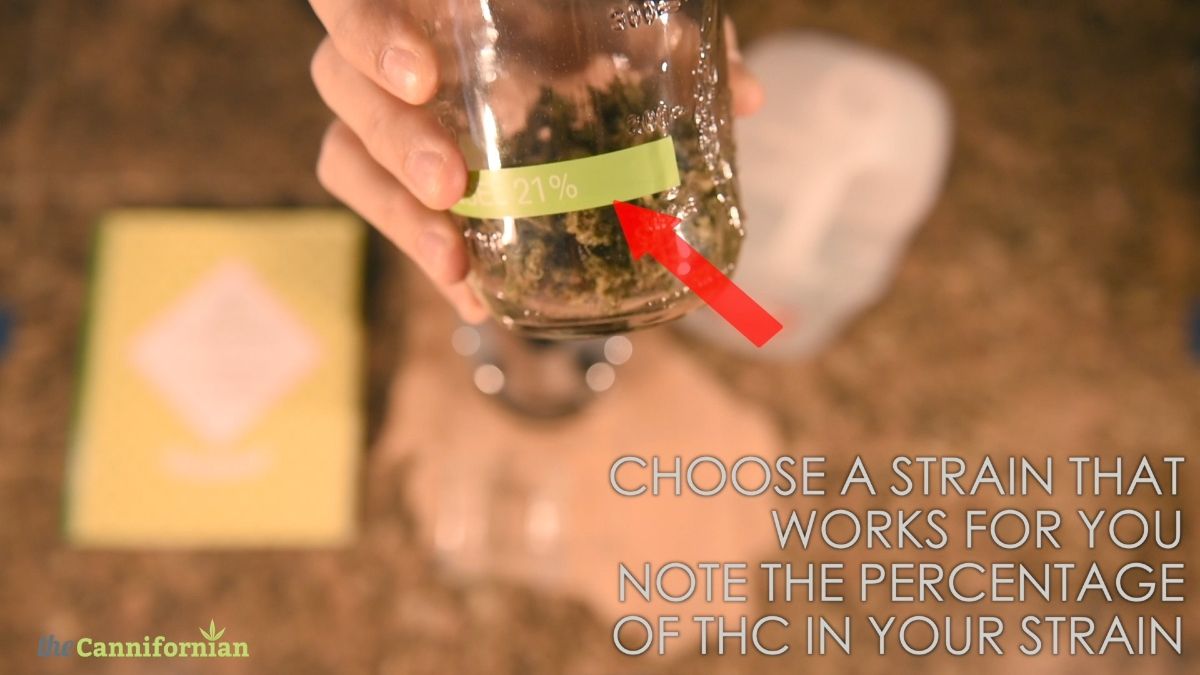
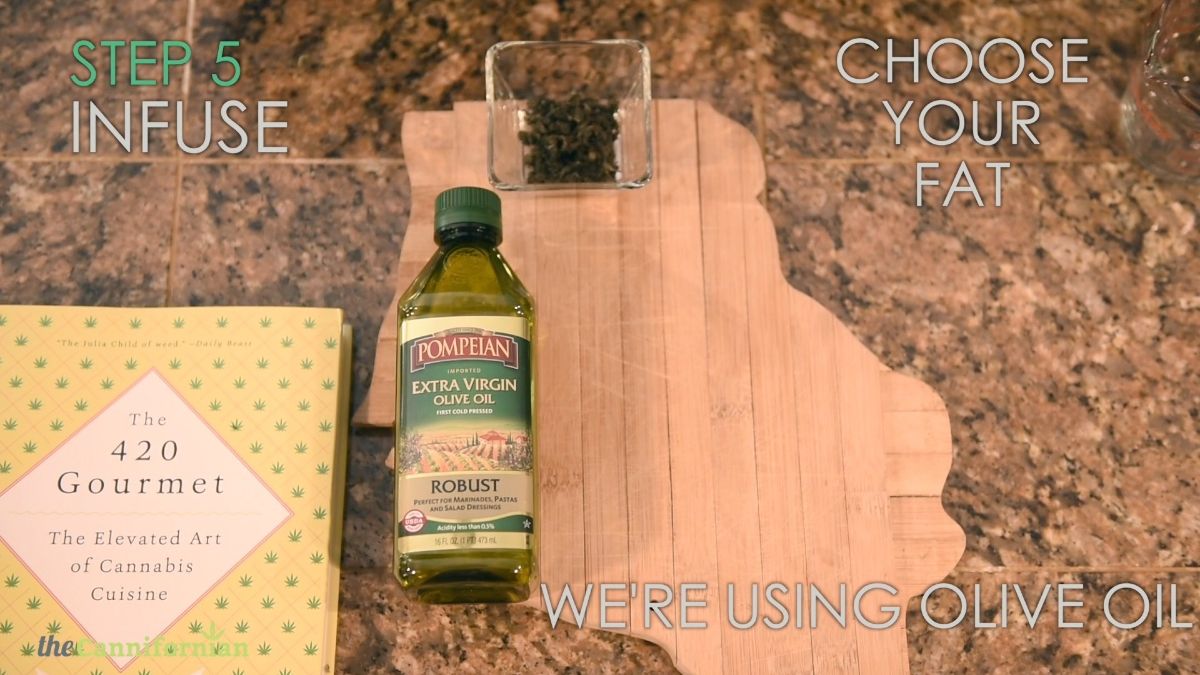
If you know me at all, you know that I love the taste of my weed oil. The pot that the farmer and I grow is some dank organic greenhouse nugget and we get to choose our varieties. That means that some of our stuff is fruity tasting and some can taste a little spicier. I’m all about figuring out ways to compliment these flavors instead of trying to hide them or cover them up. Artichoke Dip is one of my favorites for complimenting a dank/spicy flavored strain while adding fruity strains to green smoothies and berry shakes is the way to go.
If you, like me, don’t mind/weirdly enjoy the taste of your weed oil, skip this whole process and get right to baking!
But my world is expanding these days and it’s not really about my personal preference anymore. I realize that most folks are at the mercy of someone else to provide god-knows-what-it-is in a bag, and I remember how bad some of that stuff tasted.
I also started baking for the elderly recently, which is so rewarding and fun. Since providing end-of-life pain relief has become a new found love, making edibles more palatable and downright joy-mongering, has also come into the forefront of how I make weed food. Change is good.
Enter… The Weed Wash
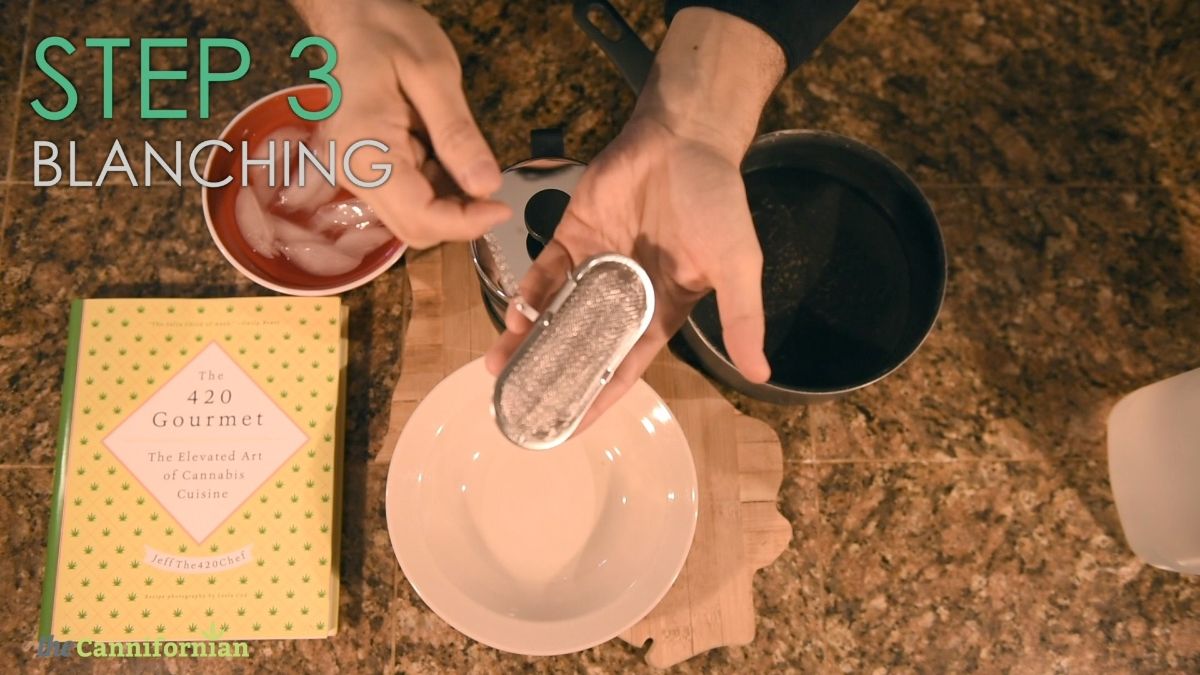
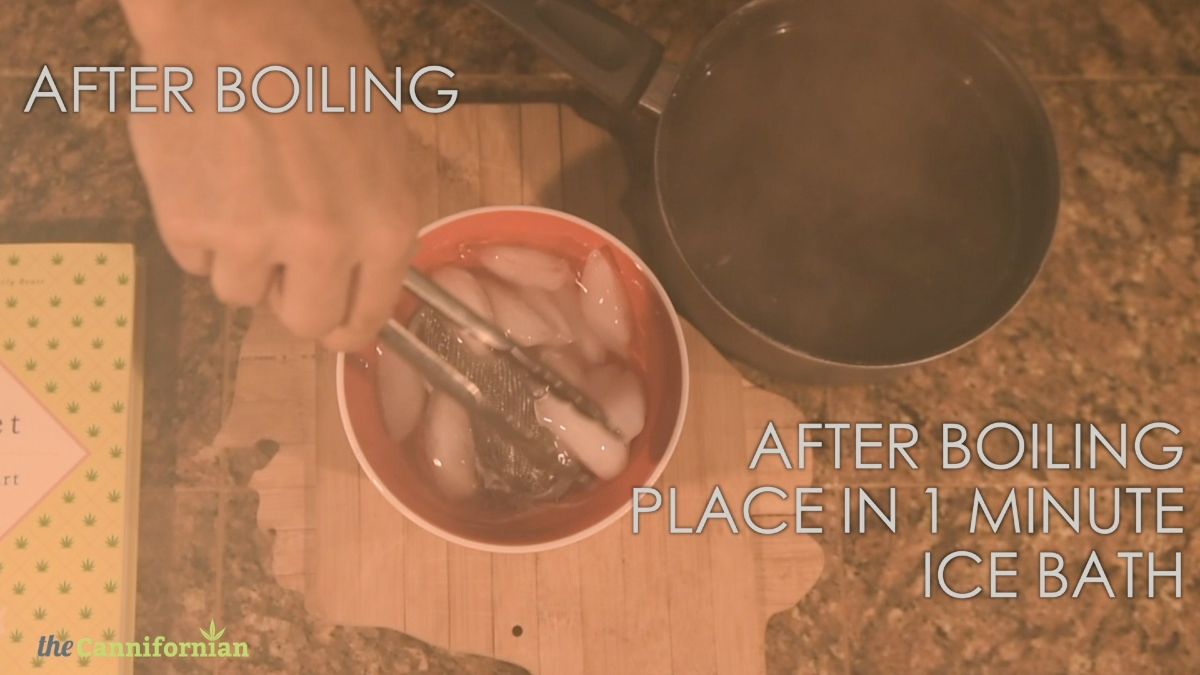
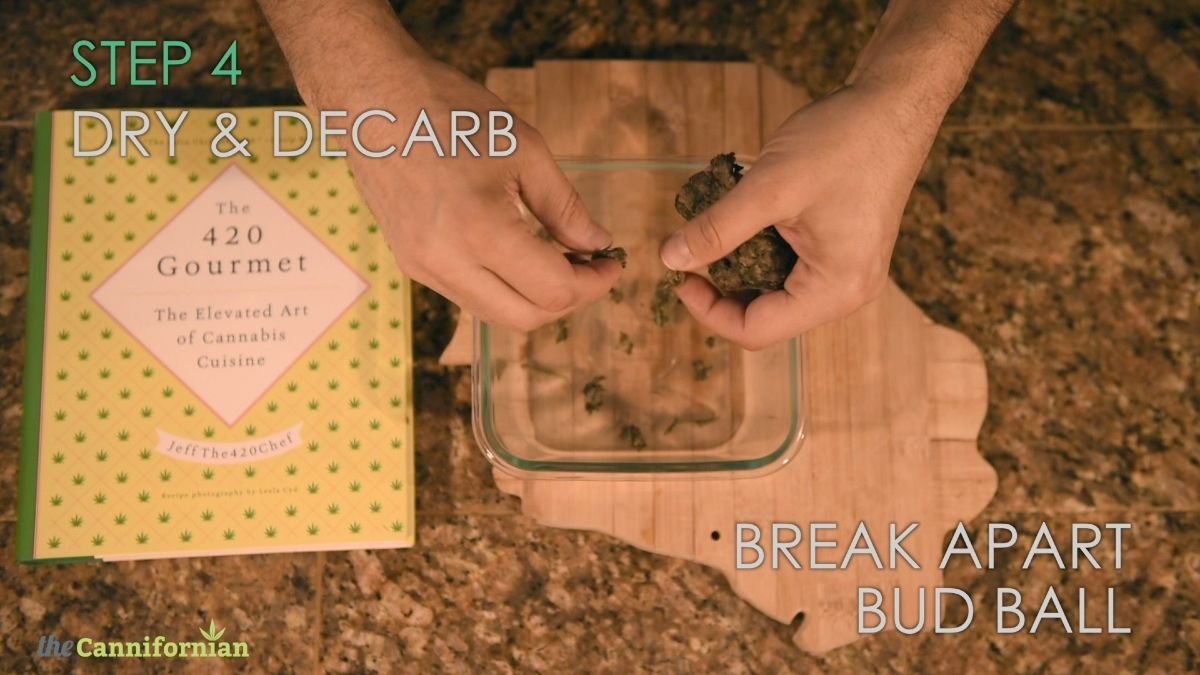
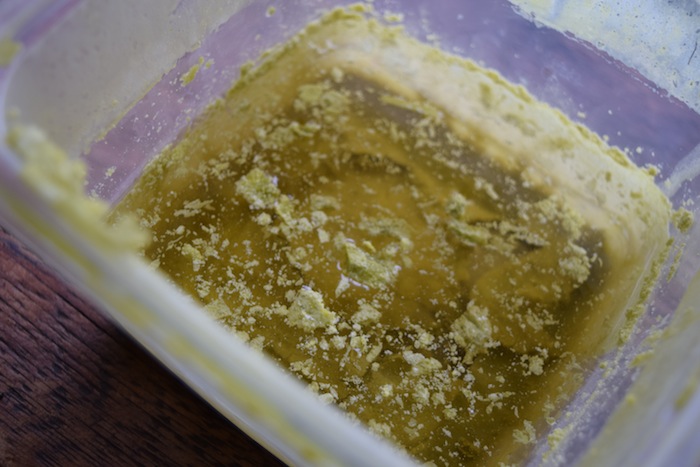
Before you run to the bathtub and start drawing a bubble bath for your trim stash, know that I’m not talking about actually washing your weed (although that is a thing I guess). The Weed Wash is a technique you can use after you make your oil. It helps remove the chlorophyl and other compounds that cause the “green” taste in your green oil.
Do not mistake this for adding water to your oil during the extraction process. If you’re considering doing this because a bunch of noobs on internet forums are telling you to, just don’t.
I got lured into using this technique when I first started working on Wake & Bake, and made several batches adding water to my oil and dope mix. At first, I was like “AWESOME! Look at all of the black weirdness that the water is getting out of the oil.” The water looked like some straight up black lagoon shit and I figured it was pulling out “impurities” and leaving the oil with better flavor.
Soon after, I realized my oil wasn’t storing as well and I noticed that the consistency was kind of gummy. I also noticed that the potency wasn’t on par with the oil I had in the freezer (same trim, no water during extraction). Then I was like, “This is an unnecessary hassle that reduces potency? Aw hell naw.”
On Bad Kat’s Canna Pharm, she has a great article about why adding water to your oil during the extraction process is Lame with a capital L. I won’t go into too much detail, because she’s got it covered, but here are a few key points that may help you understand why adding water while extracting is no bueno:
The water is not responsible for stripping the components you want: it only pulls excessive salt, chlorophyll and other inert properties into the mix, while at the same time hindering the oil and its ability to break down your cannabis glandular material.
Besides external contact interfering, the inert plant matter soaks up additional water via passive capillary action before it can absorb the oil, and overall prevents the oil from gaining as solid access and contact as it otherwise would have, ultimately preventing the oil that you’re relying on, to perform the extraction, from doing the job or making the progress that it otherwise could.
This leads to extended cooking requirements, including the 24-hour to several-day-long canna butter and oil recipes of the past, causing your cannabis to undergo unneeded degradation and excessive heat exposure.
[…]
What’s worse….
Besides making a butter or oil with a reduced bioavailability when water is allowed in the oil or butter too early, and besides pulling in all the extra salts and waxes and chlorophyll that a pure oil wouldn’t…. that waste water you toss out at the end, if you check the bottom, after it’s settled?
You will notice a hash sediment.
[…] So many people, especially with the brief heating times recommended for water-butters these days, unwittingly pour out the equivalent of hash almost every single time they make canna butter!
Why Add Water AFTER Extraction?
It works. Period.
I was skeptical after my first water/oil experience, but I saw that BadKat and a few others recommended it on a forum, and since I was making a batch of cookies for a 90 year old man, I figured it would be a great time to test the technique.
Here were my results…
After Zero Weed Washes
After whipping up a batch of oil in the MB machine, I split the oil in half so I could have a control for this experiment. This batch was right out of the machine, no water added.
Scent: Delightful to me, but strong.
Flavor: Nutty, and distinctly weed-y.
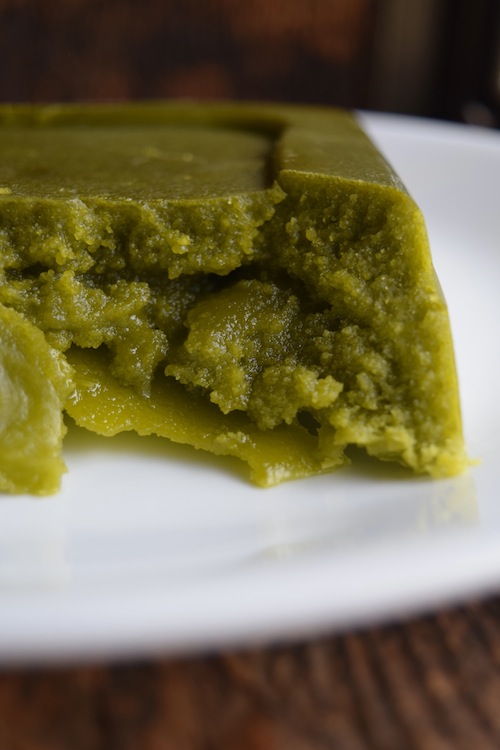
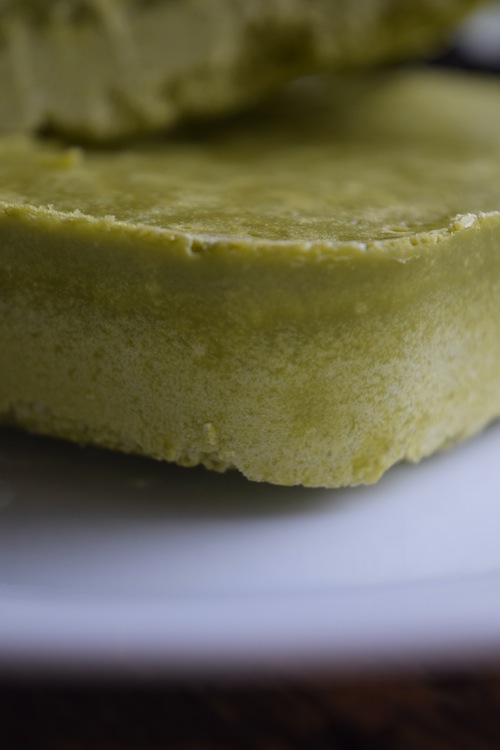
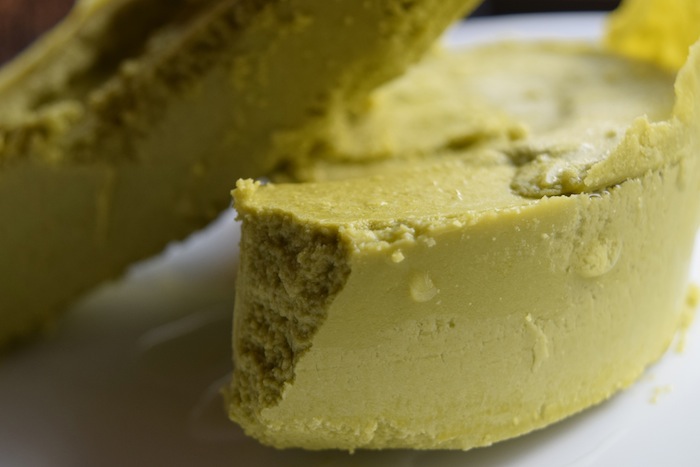
Texture: Solid, like regular coconut oil at room temp. A bit of dark particle sediment on the bottom.
After One Weed Wash
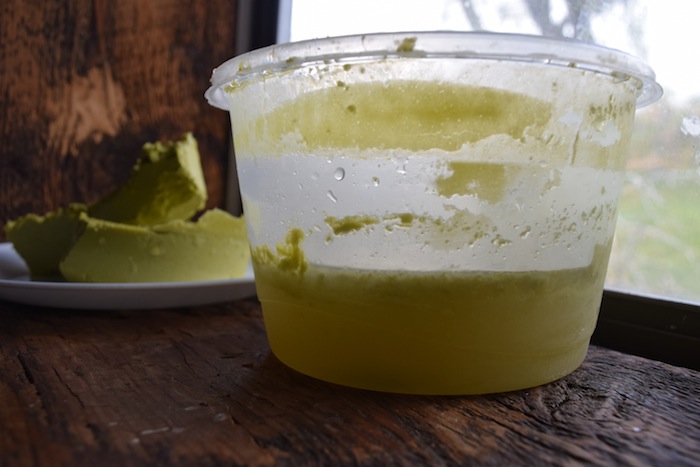
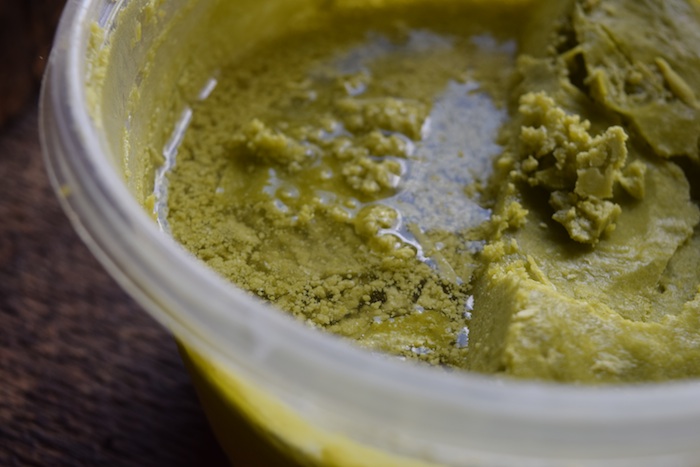
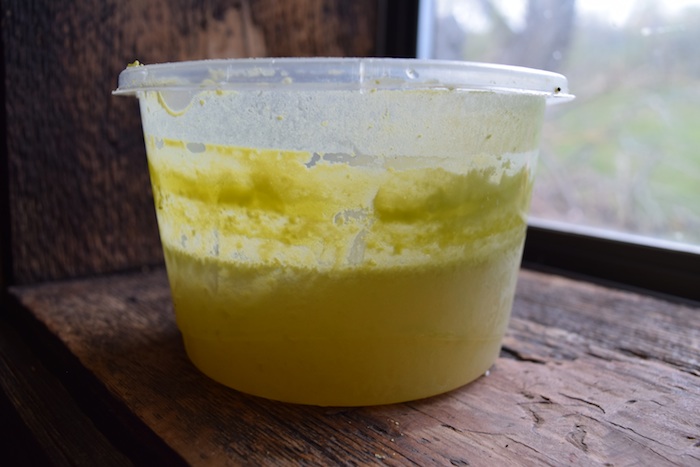
I melted the canna oil down and added room temperature/cold-ish water and put it in the fridge overnight. When I woke up, I cut the oil that had risen to the top and removed it from the container. There were oil chunks floating around and the water had turned a light green-golden color. It seems like you lose some oil while doing this, but the difference in the smell and taste was pretty incredible.
Scent: Mildly weedy.

Flavor: Light, and still nutty.
Texture: Still solid, like regular coconut oil at room temp, but the dark Particle sediment on the bottom was nowhere in sight.
After Two Weed Washes
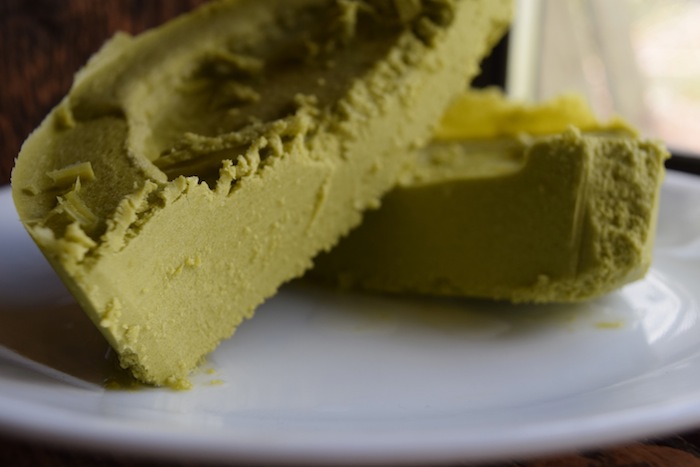
In hindsight, this is where I would stop. As you’ll see in the next wash, the oil seemed to get somewhat waterlogged, but that could have been because I got pressed for time and put it in the freezer for a few hours. Still, this batch was perfect and I think it’s worth the time and effort up until this point. After this wash, the oil was perfect for whipping up and had the faintest weed taste and smell. It was really nice.
Scent: Faintly weedy.
Flavor: Light and tasty.
Texture: Creamy and light. It seemed like it would have made a great whipped spread, but I’ll have to try that the next time I stop at this many washes.
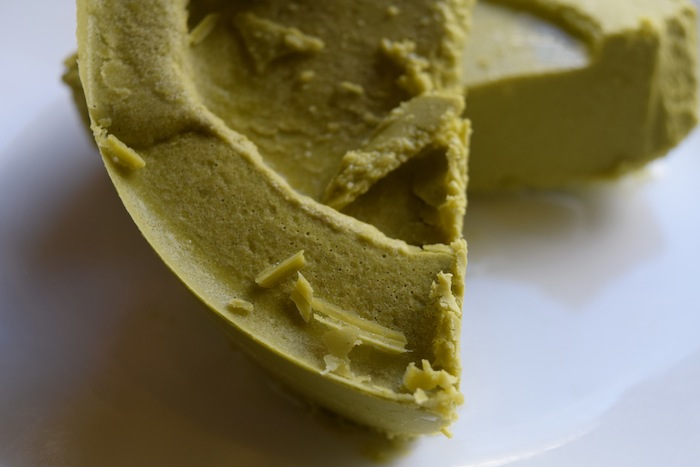
After Three Weed Washes (overkill)
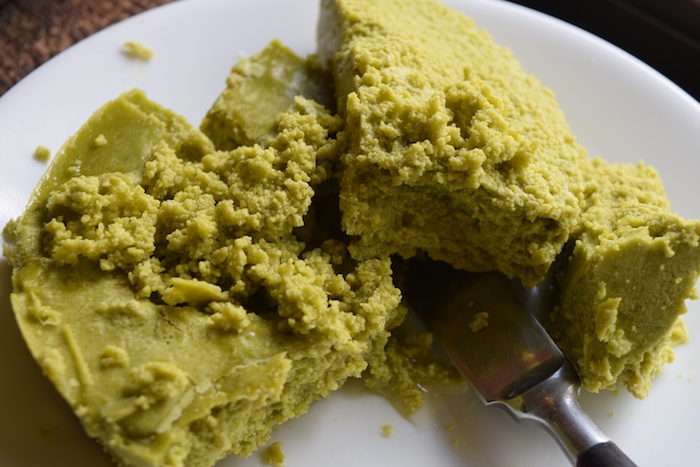
At this point, I was ready to get baking, so I did the last wash and tossed it in the freezer. This must have been no bueno, because the oil got waterlogged and when I was baking with it, I had to let the water drip out on several occasions. It didn’t change much flavor or scent wise, but the water still turned colors a bit, so I’m guessing that something was still happening.
Scent: Lightly weedy. Not noticeable at all until your nose was right up on it.
Flavor: Light with a tiny bit of a weedy after taste.
Texture: Waterlogged, which I think was due to rushing it into the freezer. Other than that, once I got most of the water , it creamed up with sugar for cookies very nicely.
In Short
From my experience, if you’re trying to improve the flavor of your canna oil without destroying potency or the cannabinoid profile, doing a post-extraction wash or two can be a valuable use of your time. However, the more you mess with your oil, the more chances you have to do something weird to it (see Weed Wash #3), so it may be a little much to keep washing your canna oil, especially if it doesn’t taste awful.
Weed Wash: For Better Tasting Edibles
I finally got around to answering 10’s of 10’s of comments this morning (41!) and realized in the end that 10 of those didn’t go through. Boo… Hiss…
But three out of those ten commenters really wanted to know how to get some of the “weed” taste out of your weed oil. I just so happen to have been working on a tutorial for this that I wrapped up yesterday.
If you know me at all, you know that I love the taste of my weed oil. The pot that the farmer and I grow is some dank organic greenhouse nugget and we get to choose our varieties. That means that some of our stuff is fruity tasting and some can taste a little spicier. I’m all about figuring out ways to compliment these flavors instead of trying to hide them or cover them up. Artichoke Dip is one of my favorites for complimenting a dank/spicy flavored strain while adding fruity strains to green smoothies and berry shakes is the way to go.
If you, like me, don’t mind/weirdly enjoy the taste of your weed oil, skip this whole process and get right to baking!
But my world is expanding these days and it’s not really about my personal preference anymore. I realize that most folks are at the mercy of someone else to provide god-knows-what-it-is in a bag, and I remember how bad some of that stuff tasted.
I also started baking for the elderly recently, which is so rewarding and fun. Since providing end-of-life pain relief has become a new found love, making edibles more palatable and downright joy-mongering, has also come into the forefront of how I make weed food. Change is good.
Enter… The Weed Wash
Before you run to the bathtub and start drawing a bubble bath for your trim stash, know that I’m not talking about actually washing your weed (although that is a thing I guess). The Weed Wash is a technique you can use after you make your oil. It helps remove the chlorophyl and other compounds that cause the “green” taste in your green oil.
Do not mistake this for adding water to your oil during the extraction process. If you’re considering doing this because a bunch of noobs on internet forums are telling you to, just don’t.
I got lured into using this technique when I first started working on Wake & Bake, and made several batches adding water to my oil and dope mix. At first, I was like “AWESOME! Look at all of the black weirdness that the water is getting out of the oil.” The water looked like some straight up black lagoon shit and I figured it was pulling out “impurities” and leaving the oil with better flavor.
Soon after, I realized my oil wasn’t storing as well and I noticed that the consistency was kind of gummy. I also noticed that the potency wasn’t on par with the oil I had in the freezer (same trim, no water during extraction). Then I was like, “This is an unnecessary hassle that reduces potency? Aw hell naw.”
On Bad Kat’s Canna Pharm, she has a great article about why adding water to your oil during the extraction process is Lame with a capital L. I won’t go into too much detail, because she’s got it covered, but here are a few key points that may help you understand why adding water while extracting is no bueno:
The water is not responsible for stripping the components you want: it only pulls excessive salt, chlorophyll and other inert properties into the mix, while at the same time hindering the oil and its ability to break down your cannabis glandular material.
Besides external contact interfering, the inert plant matter soaks up additional water via passive capillary action before it can absorb the oil, and overall prevents the oil from gaining as solid access and contact as it otherwise would have, ultimately preventing the oil that you’re relying on, to perform the extraction, from doing the job or making the progress that it otherwise could.
This leads to extended cooking requirements, including the 24-hour to several-day-long canna butter and oil recipes of the past, causing your cannabis to undergo unneeded degradation and excessive heat exposure.
[…]
What’s worse….
Besides making a butter or oil with a reduced bioavailability when water is allowed in the oil or butter too early, and besides pulling in all the extra salts and waxes and chlorophyll that a pure oil wouldn’t…. that waste water you toss out at the end, if you check the bottom, after it’s settled?
You will notice a hash sediment.
[…] So many people, especially with the brief heating times recommended for water-butters these days, unwittingly pour out the equivalent of hash almost every single time they make canna butter!
Why Add Water AFTER Extraction?
It works. Period.
I was skeptical after my first water/oil experience, but I saw that BadKat and a few others recommended it on a forum, and since I was making a batch of cookies for a 90 year old man, I figured it would be a great time to test the technique.
Here were my results…
After Zero Weed Washes
After whipping up a batch of oil in the MB machine, I split the oil in half so I could have a control for this experiment. This batch was right out of the machine, no water added.
Scent: Delightful to me, but strong.

Flavor: Nutty, and distinctly weed-y.
Texture: Solid, like regular coconut oil at room temp. A bit of dark particle sediment on the bottom.

After One Weed Wash
I melted the canna oil down and added room temperature/cold-ish water and put it in the fridge overnight. When I woke up, I cut the oil that had risen to the top and removed it from the container. There were oil chunks floating around and the water had turned a light green-golden color. It seems like you lose some oil while doing this, but the difference in the smell and taste was pretty incredible.

Scent: Mildly weedy.

Flavor: Light, and still nutty.
Texture: Still solid, like regular coconut oil at room temp, but the dark Particle sediment on the bottom was nowhere in sight.

After Two Weed Washes
In hindsight, this is where I would stop. As you’ll see in the next wash, the oil seemed to get somewhat waterlogged, but that could have been because I got pressed for time and put it in the freezer for a few hours. Still, this batch was perfect and I think it’s worth the time and effort up until this point. After this wash, the oil was perfect for whipping up and had the faintest weed taste and smell. It was really nice.

Scent: Faintly weedy.

Flavor: Light and tasty.

Texture: Creamy and light. It seemed like it would have made a great whipped spread, but I’ll have to try that the next time I stop at this many washes.

After Three Weed Washes (overkill)
At this point, I was ready to get baking, so I did the last wash and tossed it in the freezer. This must have been no bueno, because the oil got waterlogged and when I was baking with it, I had to let the water drip out on several occasions. It didn’t change much flavor or scent wise, but the water still turned colors a bit, so I’m guessing that something was still happening.

Scent: Lightly weedy. Not noticeable at all until your nose was right up on it.

Flavor: Light with a tiny bit of a weedy after taste.

Texture: Waterlogged, which I think was due to rushing it into the freezer. Other than that, once I got most of the water , it creamed up with sugar for cookies very nicely.

In Short
From my experience, if you’re trying to improve the flavor of your canna oil without destroying potency or the cannabinoid profile, doing a post-extraction wash or two can be a valuable use of your time. However, the more you mess with your oil, the more chances you have to do something weird to it (see Weed Wash #3), so it may be a little much to keep washing your canna oil, especially if it doesn’t taste awful.