|
Sponsored by |
|---|

|

|
-
Need help navigating the forum? Find out how to use our features here.
-
Did you know we have lots of smilies for you to use?
You are using an out of date browser. It may not display this or other websites correctly.
You should upgrade or use an alternative browser.
You should upgrade or use an alternative browser.
Tips Proper way to clean a nail And seasoning
- Thread starter Vicki
- Start date
Prolusio
Member
@Vicki I believe ceramic nails benefit from seasoning but the process for ceramic is very quick, you've probably already well seasoned it with your first sessions. Seasoning is most important with Ti so you can remove manufacturing oils and build up an oxide(?) layer to help improve taste; with ceramic it's mostly just to clean it off from factory so you don't really have to worry about it.
As far as cleaning I think it's best just to wipe ceramic off and use the rigs own heat to clean it; I don't believe soaking it in ISO will remove it's patina (which is also an indicator the ceramic has been seasoned).
I've heard of people torching their ceramic so hot that it cracks and still not getting it looking white again; I think it's pretty hard to get it pristine again and it's normal for ceramic to darken.
I'm not sure exactly how long to go between cleaning.. I'm not the most fastidious of vapers but my advice would be if it starts to taste off then it could probably use a burn/wipe off.
Vicki
Herbal Alchemist
Thank you @Prolusio !
I saw a video on YouTube that Dr. Dabber posted that said to use a torch to clean the ceramic nail, but all the comments warned not to do it. Saying it ruined the threads on the nail. That scared me. That's why I asked about soaking it in ISO.
I don't think it will need cleaned for a while. I hope my gut instinct isn't right that these are actually meant to be disposable. At least in units like these.
mvapes
Active Member
Tje trick to cleaning ceramic with heat is you have to keep the flame moving. Alcohol is ok but ceramic is slightly porous and eventually will start to deteriorate from the alcohol drying it out.
My suggestion is to take your torch at a medium flame and in circular motions heat the dish until a slight glow.
Once glowing give it a break and repeat for two or three times.
Just be careful not to over do it or you'll start seeing stress cracks appearing.
My suggestion is to take your torch at a medium flame and in circular motions heat the dish until a slight glow.
Once glowing give it a break and repeat for two or three times.
Just be careful not to over do it or you'll start seeing stress cracks appearing.
Baron23
Well-Known Member
Tje trick to cleaning ceramic with heat is you have to keep the flame moving. Alcohol is ok but ceramic is slightly porous and eventually will start to deteriorate from the alcohol drying it out.
My suggestion is to take your torch at a medium flame and in circular motions heat the dish until a slight glow.
Once glowing give it a break and repeat for two or three times.
Just be careful not to over do it or you'll start seeing stress cracks appearing.
Also be sure to not dunk it in water or anything else cool until it has returned to room temp lest thermal shock crack it.
ataxian
In a BLACK HOLE!
I just brush my coils with ROSIN and fill my TANK with EJUICE & KEIF?Tje trick to cleaning ceramic with heat is you have to keep the flame moving. Alcohol is ok but ceramic is slightly porous and eventually will start to deteriorate from the alcohol drying it out.
My suggestion is to take your torch at a medium flame and in circular motions heat the dish until a slight glow.
Once glowing give it a break and repeat for two or three times.
Just be careful not to over do it or you'll start seeing stress cracks appearing.
MOD at 40Watts. (28.5 - 42.5)
The NAIL's on the EVO were great.
Unfortunately I broke them all?
There must be a unbreakable material to make them?
Baron23
Well-Known Member
Hi Ataxian - we need to find someone to make EVO nails out of this:I just brush my coils with ROSIN and fill my TANK with EJUICE & KEIF?
MOD at 40Watts. (28.5 - 42.5)
The NAIL's on the EVO were great.
Unfortunately I broke them all?
There must be a unbreakable material to make them?
http://www.popsci.com/technology/article/2011-01/new-metallic-glass-toughest-strongest-material-yet
Regarding the seasoning of nails:
HOW TO SEASON A DAB NAIL - QUARTZ, TITANIUM & CERAMIC
When Martha Stewart gets a new cast iron skillet, she says it is “of immense importance” to season it properly to achieve the desired terps and to get a lifetime of proper use out of it. Ok, Martha didn’t say “terps” but the same can certainly be said about seasoning your dab nail.
Whether you prefer to use quartz, or if ceramic is more your style, or if good old fashioned titanium is the ticket for you, the way you prepare your dab nail for use can make all the difference in the world when it comes to saving flavor.
When Martha gets her new pan, the first thing she likes to do is clean it and you should do the same with your dab nail. Since we know that water and oil don’t mix, it is recommended that you avoid using water to clean your new nail, but instead use heat.
Throughout the manufacturing process, the packaging process, the warehousing and distribution process, the shipping process, and all the rest, there is a good chance that your nail and its dabbing surface have at least some degree of fingerprints and/or filth on it, and you’d don’t want to dab that.
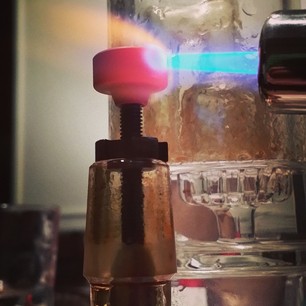
The three materials – quartz, titanium & ceramic – all have different methods for proper and even heating, but you essentially want to heat the nail head up to a pretty extreme temperature. Again, the amount of time you torch it will vary between titanium and ceramic for example, or even between two different designs. Once you see the glow, just naturally let the nail cool down. Then repeat one or two more times
Now that your nail head is clean, it is time to season it – don’t worry, you can dab soon!
A. Seasoning a dab nail with Claim (oil recovered from a smoking device like a dab rig, aka Reclaim)
The most common, and probably the most effective, way to season your nail, regardless of what it is made of, is by using the Claim, or Reclaim, captured from your rig after a series of sessions. While most people don’t want to dab this Claim, it is still a full melt product ready to vaporize on a new hot nail.
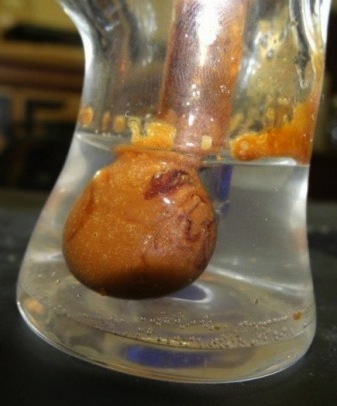
All you need to do is heat your nail as though you were preparing it for a dab. Once it is at a nice mild temp, apply a generous .10 to .25 gram glob of Claim on it, stirring the oil around the dish and allowing it to coat the entire nail head as it vaporizes away. You don’t need to, or probably want to, inhale the smoke produced. Just let it go. You can repeat this process another round or two to ensure full coverage in the dish.
While titanium is nowhere near as porous as Martha’s iron skillet, it seems to benefit the most from a proper seasoning technique. Ceramic and quartz are non-porous, so the seasoning process on these dab nails is mostly for cleaning and “breaking in” purposes, more than setting a foundation for flavor profile.
B. Seasoning a dab nail without Claim
Maybe you are breaking in a new rig and a new dab nail, or maybe you are just not the type to accumulate Claim – that’s ok – there are options for you too. If it is just the thought of putting Reclaim on your new nail that turns you off, you can use your own high quality oil to achieve the same goal.
While we do recommend that you at least put your new nail through the heating/cooling cleaning process described above, there are plenty of people who have a different name for seasoning a nail, they simply call it “doing dabs”.
Yes, you can just start ripping that new dab nail right away, but unseasoned titanium tends to leave a distinct metallic undertone for the first several hits, and quartz and ceramic also seem to hit their “sweet spot” after they’ve been broken in a bit. If you’re going to start ripping your new nail right away, the key is to take very low temp dabs to minimize any off flavors.
C. Things NOT to do when seasoning a new dab nail
Well, there are about a million things NOT to do with your new dab nail, but one of the most common pieces of bad advice out there is to season and clean your new nail by repeatedly heating it up red hot, then dousing it in clean, cool water.
Ceramic or glass nails will likely shatter and be completely destroyed. While a quartz nails can technically withstand this sort of abuse, it will absolutely shorten the life of your nail. It also causes an increase in oxide buildup, which negates the lifetime and efficiency of your dab nail (especially for titanium).
In researching this blog we even came across a guy telling people to heat the nail, then put salt on it, then heat it again and put jelly on it. Seriously.....Don’t do that.....
Martha slaps some Crisco on her gear and tosses it in the oven to season it – fresh oil and plenty of heat are your ingredients for a properly seasoned dab nail too.
Looking into how to clean your dab nail, I found this:
We’ve all been in that situation where our nails have looked a little rough for the wear after many dabbing sessions. Carbon buildup, reclaimed oil, and particulates are all symptoms of a nail that needs cleaning. Even more, these issues are not isolated to any particular nail type and can happen whether you use titanium, quartz, or even ceramic hardware.
Fortunately, cleaning a nail is super simple and there are several methods you can use depending on the severity of buildup. Here are four quick tips you can use to clean your nail at home using a few basic household ingredients.
Scrape
For minor buildup, grab your sharpest dabber tool or metal object such as a paper clip and lightly scrape away the carbon buildup and reclaim from the surface and interior of your nail. Sharper tools work much better for getting into hard-to-reach corners. Carbon buildup can be scraped and removed relatively easy; however, to remove sticky reclaim, you may need to proceed to the next step.
Torch
Torching is an easy and effective method of cleaning any level of buildup from your nail. Simply apply an excess amount of heat to your nail via a torch to burn off any residual carbon or reclaim on your nail. When applying this method to ceramic and quartz nails, be careful not to expose your red hot nail to a rapid change in temperature or you may risk a stress fracture. After your nail becomes red hot and the residue dissipates, let it cool down completely before finishing off with a final scrape.
Wash
For that clean, shiny new nail look, try washing your hardware in a bath of 91% isopropyl alcohol solution for 10-15 minutes. This will break down any hard-to-reach, excess buildup that your nail may have. Be sure to wash your nail with water and season a few times before applying concentrate to ensure all of the alcohol has been removed.
Preventative Maintenance
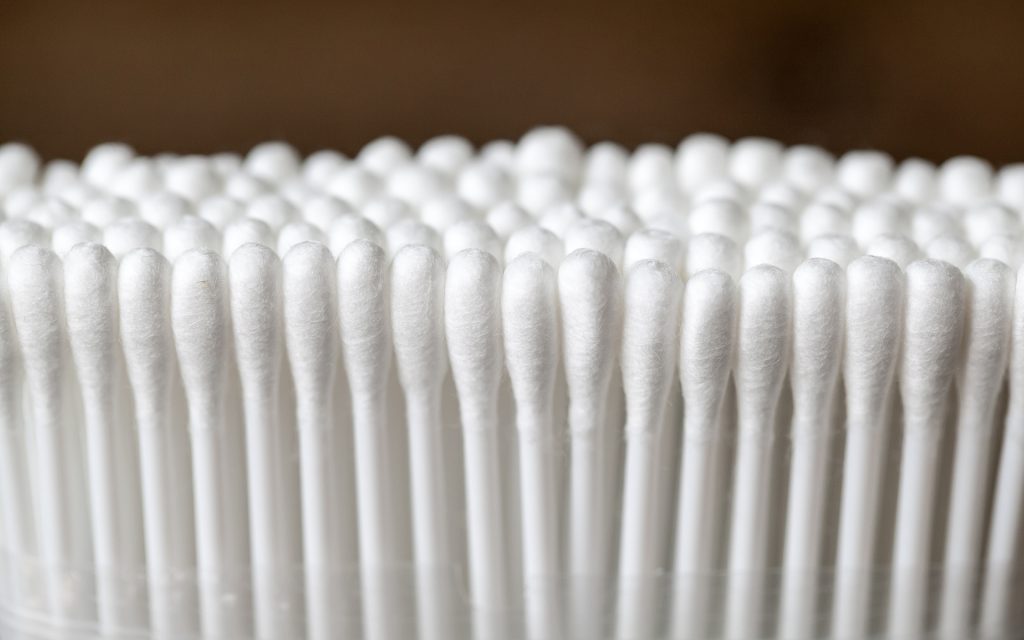
The final phase in caring for your nail is preventative maintenance. By lightly cleaning your nail between every dab, you ensure longer durations between heavy cleaning by preventing residue from building up. Try keeping a supply of cotton swabs nearby and wiping the excess oil from your nail 20-30 seconds after each dab. This will keep your nail significantly cleaner, yielding better flavor and airflow in every future dab.
But this still doesn't address @Vicki's question about how to clean her ceramic nail. The only thing I've seen recommended is heat for this. Since you can't use a torch in your Dr. Dabber unit, I would think several burn offs would be recommended; being careful not to leave the nail on high heat for too long of a period of time each time to avoid cracking.
HOW TO SEASON A DAB NAIL - QUARTZ, TITANIUM & CERAMIC
When Martha Stewart gets a new cast iron skillet, she says it is “of immense importance” to season it properly to achieve the desired terps and to get a lifetime of proper use out of it. Ok, Martha didn’t say “terps” but the same can certainly be said about seasoning your dab nail.
Whether you prefer to use quartz, or if ceramic is more your style, or if good old fashioned titanium is the ticket for you, the way you prepare your dab nail for use can make all the difference in the world when it comes to saving flavor.
When Martha gets her new pan, the first thing she likes to do is clean it and you should do the same with your dab nail. Since we know that water and oil don’t mix, it is recommended that you avoid using water to clean your new nail, but instead use heat.
Throughout the manufacturing process, the packaging process, the warehousing and distribution process, the shipping process, and all the rest, there is a good chance that your nail and its dabbing surface have at least some degree of fingerprints and/or filth on it, and you’d don’t want to dab that.
The three materials – quartz, titanium & ceramic – all have different methods for proper and even heating, but you essentially want to heat the nail head up to a pretty extreme temperature. Again, the amount of time you torch it will vary between titanium and ceramic for example, or even between two different designs. Once you see the glow, just naturally let the nail cool down. Then repeat one or two more times
Now that your nail head is clean, it is time to season it – don’t worry, you can dab soon!
A. Seasoning a dab nail with Claim (oil recovered from a smoking device like a dab rig, aka Reclaim)
The most common, and probably the most effective, way to season your nail, regardless of what it is made of, is by using the Claim, or Reclaim, captured from your rig after a series of sessions. While most people don’t want to dab this Claim, it is still a full melt product ready to vaporize on a new hot nail.
All you need to do is heat your nail as though you were preparing it for a dab. Once it is at a nice mild temp, apply a generous .10 to .25 gram glob of Claim on it, stirring the oil around the dish and allowing it to coat the entire nail head as it vaporizes away. You don’t need to, or probably want to, inhale the smoke produced. Just let it go. You can repeat this process another round or two to ensure full coverage in the dish.
While titanium is nowhere near as porous as Martha’s iron skillet, it seems to benefit the most from a proper seasoning technique. Ceramic and quartz are non-porous, so the seasoning process on these dab nails is mostly for cleaning and “breaking in” purposes, more than setting a foundation for flavor profile.
B. Seasoning a dab nail without Claim
Maybe you are breaking in a new rig and a new dab nail, or maybe you are just not the type to accumulate Claim – that’s ok – there are options for you too. If it is just the thought of putting Reclaim on your new nail that turns you off, you can use your own high quality oil to achieve the same goal.
While we do recommend that you at least put your new nail through the heating/cooling cleaning process described above, there are plenty of people who have a different name for seasoning a nail, they simply call it “doing dabs”.
Yes, you can just start ripping that new dab nail right away, but unseasoned titanium tends to leave a distinct metallic undertone for the first several hits, and quartz and ceramic also seem to hit their “sweet spot” after they’ve been broken in a bit. If you’re going to start ripping your new nail right away, the key is to take very low temp dabs to minimize any off flavors.
C. Things NOT to do when seasoning a new dab nail
Well, there are about a million things NOT to do with your new dab nail, but one of the most common pieces of bad advice out there is to season and clean your new nail by repeatedly heating it up red hot, then dousing it in clean, cool water.
Ceramic or glass nails will likely shatter and be completely destroyed. While a quartz nails can technically withstand this sort of abuse, it will absolutely shorten the life of your nail. It also causes an increase in oxide buildup, which negates the lifetime and efficiency of your dab nail (especially for titanium).
In researching this blog we even came across a guy telling people to heat the nail, then put salt on it, then heat it again and put jelly on it. Seriously.....Don’t do that.....
Martha slaps some Crisco on her gear and tosses it in the oven to season it – fresh oil and plenty of heat are your ingredients for a properly seasoned dab nail too.
Looking into how to clean your dab nail, I found this:
We’ve all been in that situation where our nails have looked a little rough for the wear after many dabbing sessions. Carbon buildup, reclaimed oil, and particulates are all symptoms of a nail that needs cleaning. Even more, these issues are not isolated to any particular nail type and can happen whether you use titanium, quartz, or even ceramic hardware.
Fortunately, cleaning a nail is super simple and there are several methods you can use depending on the severity of buildup. Here are four quick tips you can use to clean your nail at home using a few basic household ingredients.
Scrape
For minor buildup, grab your sharpest dabber tool or metal object such as a paper clip and lightly scrape away the carbon buildup and reclaim from the surface and interior of your nail. Sharper tools work much better for getting into hard-to-reach corners. Carbon buildup can be scraped and removed relatively easy; however, to remove sticky reclaim, you may need to proceed to the next step.
Torch
Torching is an easy and effective method of cleaning any level of buildup from your nail. Simply apply an excess amount of heat to your nail via a torch to burn off any residual carbon or reclaim on your nail. When applying this method to ceramic and quartz nails, be careful not to expose your red hot nail to a rapid change in temperature or you may risk a stress fracture. After your nail becomes red hot and the residue dissipates, let it cool down completely before finishing off with a final scrape.
Wash
For that clean, shiny new nail look, try washing your hardware in a bath of 91% isopropyl alcohol solution for 10-15 minutes. This will break down any hard-to-reach, excess buildup that your nail may have. Be sure to wash your nail with water and season a few times before applying concentrate to ensure all of the alcohol has been removed.
Preventative Maintenance
The final phase in caring for your nail is preventative maintenance. By lightly cleaning your nail between every dab, you ensure longer durations between heavy cleaning by preventing residue from building up. Try keeping a supply of cotton swabs nearby and wiping the excess oil from your nail 20-30 seconds after each dab. This will keep your nail significantly cleaner, yielding better flavor and airflow in every future dab.
But this still doesn't address @Vicki's question about how to clean her ceramic nail. The only thing I've seen recommended is heat for this. Since you can't use a torch in your Dr. Dabber unit, I would think several burn offs would be recommended; being careful not to leave the nail on high heat for too long of a period of time each time to avoid cracking.
Vicki
Herbal Alchemist
Regarding the seasoning of nails:
HOW TO SEASON A DAB NAIL - QUARTZ, TITANIUM & CERAMIC
When Martha Stewart gets a new cast iron skillet, she says it is “of immense importance” to season it properly to achieve the desired terps and to get a lifetime of proper use out of it. Ok, Martha didn’t say “terps” but the same can certainly be said about seasoning your dab nail.
Whether you prefer to use quartz, or if ceramic is more your style, or if good old fashioned titanium is the ticket for you, the way you prepare your dab nail for use can make all the difference in the world when it comes to saving flavor.
When Martha gets her new pan, the first thing she likes to do is clean it and you should do the same with your dab nail. Since we know that water and oil don’t mix, it is recommended that you avoid using water to clean your new nail, but instead use heat.
Throughout the manufacturing process, the packaging process, the warehousing and distribution process, the shipping process, and all the rest, there is a good chance that your nail and its dabbing surface have at least some degree of fingerprints and/or filth on it, and you’d don’t want to dab that.
The three materials – quartz, titanium & ceramic – all have different methods for proper and even heating, but you essentially want to heat the nail head up to a pretty extreme temperature. Again, the amount of time you torch it will vary between titanium and ceramic for example, or even between two different designs. Once you see the glow, just naturally let the nail cool down. Then repeat one or two more times
Now that your nail head is clean, it is time to season it – don’t worry, you can dab soon!
A. Seasoning a dab nail with Claim (oil recovered from a smoking device like a dab rig, aka Reclaim)
The most common, and probably the most effective, way to season your nail, regardless of what it is made of, is by using the Claim, or Reclaim, captured from your rig after a series of sessions. While most people don’t want to dab this Claim, it is still a full melt product ready to vaporize on a new hot nail.
All you need to do is heat your nail as though you were preparing it for a dab. Once it is at a nice mild temp, apply a generous .10 to .25 gram glob of Claim on it, stirring the oil around the dish and allowing it to coat the entire nail head as it vaporizes away. You don’t need to, or probably want to, inhale the smoke produced. Just let it go. You can repeat this process another round or two to ensure full coverage in the dish.
While titanium is nowhere near as porous as Martha’s iron skillet, it seems to benefit the most from a proper seasoning technique. Ceramic and quartz are non-porous, so the seasoning process on these dab nails is mostly for cleaning and “breaking in” purposes, more than setting a foundation for flavor profile.
B. Seasoning a dab nail without Claim
Maybe you are breaking in a new rig and a new dab nail, or maybe you are just not the type to accumulate Claim – that’s ok – there are options for you too. If it is just the thought of putting Reclaim on your new nail that turns you off, you can use your own high quality oil to achieve the same goal.
While we do recommend that you at least put your new nail through the heating/cooling cleaning process described above, there are plenty of people who have a different name for seasoning a nail, they simply call it “doing dabs”.
Yes, you can just start ripping that new dab nail right away, but unseasoned titanium tends to leave a distinct metallic undertone for the first several hits, and quartz and ceramic also seem to hit their “sweet spot” after they’ve been broken in a bit. If you’re going to start ripping your new nail right away, the key is to take very low temp dabs to minimize any off flavors.
C. Things NOT to do when seasoning a new dab nail
Well, there are about a million things NOT to do with your new dab nail, but one of the most common pieces of bad advice out there is to season and clean your new nail by repeatedly heating it up red hot, then dousing it in clean, cool water.
Ceramic or glass nails will likely shatter and be completely destroyed. While a quartz nails can technically withstand this sort of abuse, it will absolutely shorten the life of your nail. It also causes an increase in oxide buildup, which negates the lifetime and efficiency of your dab nail (especially for titanium).
In researching this blog we even came across a guy telling people to heat the nail, then put salt on it, then heat it again and put jelly on it. Seriously.....Don’t do that.....
Martha slaps some Crisco on her gear and tosses it in the oven to season it – fresh oil and plenty of heat are your ingredients for a properly seasoned dab nail too.
Looking into how to clean your dab nail, I found this:
We’ve all been in that situation where our nails have looked a little rough for the wear after many dabbing sessions. Carbon buildup, reclaimed oil, and particulates are all symptoms of a nail that needs cleaning. Even more, these issues are not isolated to any particular nail type and can happen whether you use titanium, quartz, or even ceramic hardware.
Fortunately, cleaning a nail is super simple and there are several methods you can use depending on the severity of buildup. Here are four quick tips you can use to clean your nail at home using a few basic household ingredients.
Scrape
For minor buildup, grab your sharpest dabber tool or metal object such as a paper clip and lightly scrape away the carbon buildup and reclaim from the surface and interior of your nail. Sharper tools work much better for getting into hard-to-reach corners. Carbon buildup can be scraped and removed relatively easy; however, to remove sticky reclaim, you may need to proceed to the next step.
Torch
Torching is an easy and effective method of cleaning any level of buildup from your nail. Simply apply an excess amount of heat to your nail via a torch to burn off any residual carbon or reclaim on your nail. When applying this method to ceramic and quartz nails, be careful not to expose your red hot nail to a rapid change in temperature or you may risk a stress fracture. After your nail becomes red hot and the residue dissipates, let it cool down completely before finishing off with a final scrape.
Wash
For that clean, shiny new nail look, try washing your hardware in a bath of 91% isopropyl alcohol solution for 10-15 minutes. This will break down any hard-to-reach, excess buildup that your nail may have. Be sure to wash your nail with water and season a few times before applying concentrate to ensure all of the alcohol has been removed.
Preventative Maintenance
The final phase in caring for your nail is preventative maintenance. By lightly cleaning your nail between every dab, you ensure longer durations between heavy cleaning by preventing residue from building up. Try keeping a supply of cotton swabs nearby and wiping the excess oil from your nail 20-30 seconds after each dab. This will keep your nail significantly cleaner, yielding better flavor and airflow in every future dab.
But this still doesn't address @Vicki's question about how to clean her ceramic nail. The only thing I've seen recommended is heat for this. Since you can't use a torch in your Dr. Dabber unit, I would think several burn offs would be recommended; being careful not to leave the nail on high heat for too long of a period of time each time to avoid cracking.
Thank you for posting this! It helps a lot!
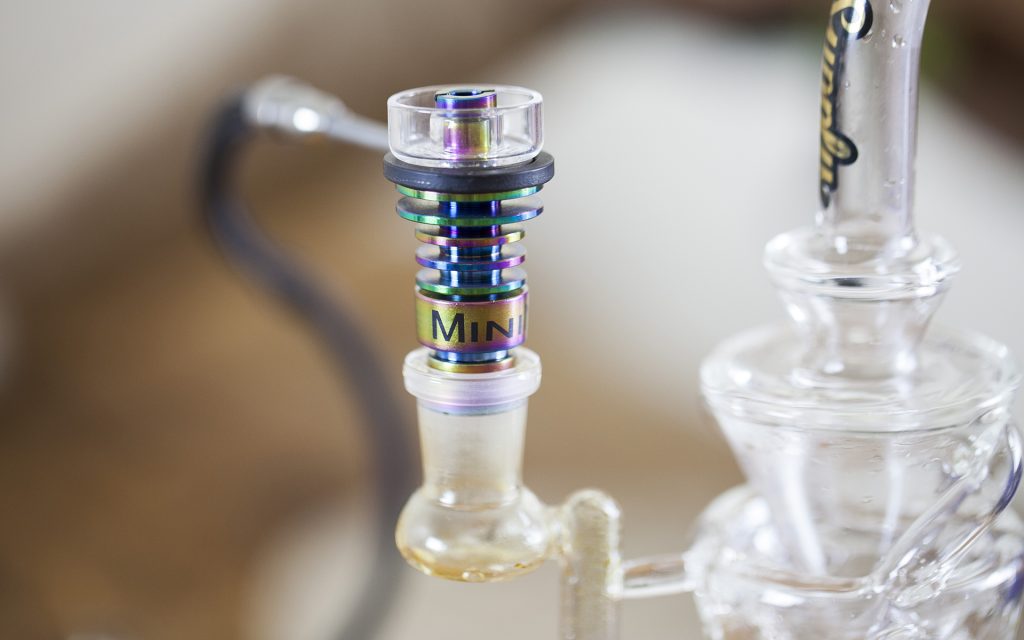
I really need it now because the titanium nail won't unscrew from my Dr Dabber Boost now! :(
Oh no.... I wonder if it's 'fused' on by a small amount of concentrate. Have you tried unscrewing it while it's warm?I really need it now because the titanium nail won't unscrew from my Dr Dabber Boost now!
Vicki
Herbal Alchemist
Oh no.... I wonder if it's 'fused' on by a small amount of concentrate. Have you tried unscrewing it while it's warm?
Yes. It just won't come off. :(
ataxian
In a BLACK HOLE!
Hi Ataxian - we need to find someone to make EVO nails out of this:
http://www.popsci.com/technology/article/2011-01/new-metallic-glass-toughest-strongest-material-yet
I break stuff all the time?
The EVO NAILS were great until I broke them all. (2 x pack's)
I'll check out your link!
ataxian
In a BLACK HOLE!
My kids say, "I'm over the top"! (they don't like my stuff?)When's your B-day? Do you have children?...maybe for fathers day? Someone please buy Ataxian some more EVO nails!!
I think we are more tolerant than the new generation?
I use a MOD or two for CONCENTRATES.
I need to hit my friend up at his machine shop.
He'll figure out how to make a UNBREAKABLE NAIL.
I only do 2 grams a week CONCENTRATES.
4 grams FLOWER + or -? (kind of strong?)
herbivore21
Well-Known Member
I really should point out that this is not strictly true. Silicone Carbide and Sapphire nails should not be seasoned at all. You want to qtip them after every dab and keep your nail looking like new with regular cleaning. I do not recommend any kind of heat cleaning with sapphire nails. IME the best thing to do with sapphire is qtip after every dab and then remove the sapphire, let it cool to room temp and then clean the remaining residue with hot water on a qtip. It'll come up good as new.The most common, and probably the most effective, way to season your nail, regardless of what it is made of
Quartz does not need to be seasoned either and IME will often taste considerably worse when seasoned than when used without seasoning at all. Additionally, the D-nail quartz halo should never be seasoned, as this will remove the unique wicking functionality that makes this nail function better than any other quartz! Same goes for any d-nail sapphire products, all of which have a patented wicking surface which would not function if you season it.
Last edited:
ataxian
In a BLACK HOLE!
I really should point out that this is not strictly true. Silicone Carbide and Sapphire nails should not be seasoned at all. You want to qtip them after every dab and keep your nail looking like new with regular cleaning. I do not recommend any kind of heat cleaning with sapphire nails. IME the best thing to do with sapphire is qtip after every dab and then remove the sapphire, let it cool to room temp and then clean the remaining residue with hot water on a qtip. It'll come up good as new.
Quartz does not need to be seasoned either and IME will often taste considerably worse when seasoned than when used without seasoning at all. Additionally, the D-nail quartz halo should never be seasoned, as this will remove the unique wicking functionality that makes this nail function better than any other quartz! Same goes for any d-nail sapphire products, all of which have a patented wicking surface which would not function if you season it.

I want to try a nail that works on electricity.
My wife won't let me use a torch?
MODS modified is what I use?
They don't bother her or me!
I do read faster!
It's the CANNABIS I believe?
Baron23
Well-Known Member
Hello my friend - in addition to q-tipping after every dab, I do occasionally clean my insert (SiC in this case) using the water and ISO method. Controller at about 250 F, put in a couple/few drops of distilled water. It should NOT boil at this point as your dab surface will be cooler than your TC reading on your controller. If it does, just drop the temp to 225 F. Then add in a couple/few drops of ISO and it will begin to boil as we have just depressed the boiling point. Immediately go to work with q-tips scrubbing and sopping up any remaining water/ISO.I really should point out that this is not strictly true. Silicone Carbide and Sapphire nails should not be seasoned at all. You want to qtip them after every dab and keep your nail looking like new with regular cleaning. I do not recommend any kind of heat cleaning with sapphire nails. IME the best thing to do with sapphire is qtip after every dab and then remove the sapphire, let it cool to room temp and then clean the remaining residue with hot water on a qtip. It'll come up good as new.
Quartz does not need to be seasoned either and IME will often taste considerably worse when seasoned than when used without seasoning at all. Additionally, the D-nail quartz halo should never be seasoned, as this will remove the unique wicking functionality that makes this nail function better than any other quartz! Same goes for any d-nail sapphire products, all of which have a patented wicking surface which would not function if you season it.
Comes out beautiful and no thermal shock risk of torching.
Last edited:
herbivore21
Well-Known Member
SiC is not in danger of thermal shock in a way that should be any concern with a butane dab torch brother. I've taken both my Liger SiC and my 3-4 year old OG first batch SiC halo and torched them until glowing bright orange a great many times with no breakage at all. I've predominately used my SiC halo as a torch nail (heating it for over a minute with the hardest hottest part of the torch flame without moving the flame around the dish!), less frequently with a coil these days. If your SiC breaks from heat, something strange has happened. Your approach to cleaning the SiC liger mentioned above shouldn't be any problem either of course :)Hello my friend - in addition to q-tipping after every dab, I do occasionally clean my insert (SiC in this case) using the water and ISO method. Controller at about 250 F, put in a couple/few drops of distilled water. It should NOT boil at this point as your dab surface will be cooler than your TC reading on your controller.
Please do not ever put liquid on sapphire, or even on quartz Liger inserts to clean in the same way though. Sapphire will not cope with this even when it has been properly manufactured and while it may survive a few applications, will definitely deteriorate over time. Quartz may have a reduced lifespan if you continually clean it in this way, but in properly manufactured and QC'd quartz inserts you should still get reasonable service from it even when cleaning in this fashion.
What we need to mention is that I know that CCA have had manufacturer related issues with the finish on some recent batches of Quartz and Sapphire inserts which spontaneously crack during normal use, and would certainly be obliterated by room temp water being applied while hot after a few such attempts (possibly even first try!). This issue seems to have gone mostly unmentioned on a certain other forum where people tend to discuss that, but I know of a number of cases and have seen several examples personally with cracked sapphire. I know that Josh has acknowledged this issue. If anyone reading this has experienced one of the cracking quartz/sapphire inserts, contact Josh, he'll make it right.
I want to try a nail that works on electricity.
My wife won't let me use a torch?
MODS modified is what I use?
They don't bother her or me!
I do read faster!
It's the CANNABIS I believe?
Oh man, you would love an e-nail! Super CIVILIZED compared to a torch and nail! It is definitely the best way to be able to use a large dose of concentrate quickly and in the smoothest possible way :D It'll be the tastiest and quickest way to consume smaller doses too.
If you do get one, make sure it is a SiC halo. You should consider a cheap e-nail controller like the auber with a SiC halo and d-nail slim series base and carb cap. You could get your hands on a high end e-nail setup for the cost of an upper mid-range flower vape ($350) :D IME, that is the nail that I have always thought would suit your needs best. It is much less fragile than quartz and white ceramics, and as strong as a variety of metals - but it tastes better than quartz and other ceramics too!

Last edited:
|
Sponsored by |
|---|
|
|
|