|
Sponsored by |
|---|

|

|
-
Need help navigating the forum? Find out how to use our features here.
-
Did you know we have lots of smilies for you to use?
You are using an out of date browser. It may not display this or other websites correctly.
You should upgrade or use an alternative browser.
You should upgrade or use an alternative browser.
Discontinued MistVape Touch
- Thread starter MistVape
- Start date
Vapes no longer in production
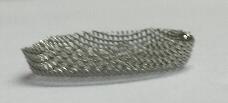
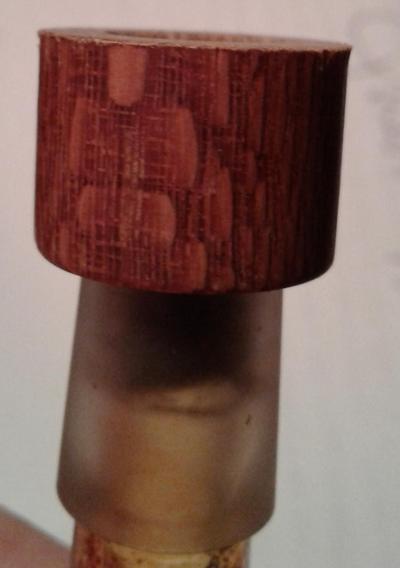
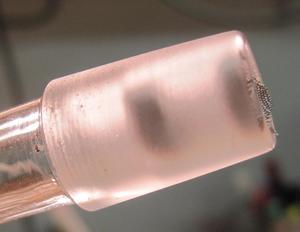
Here is the new heater screen
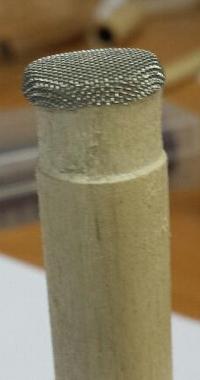
Here it is on a positioning dowel
Here it is getting inserted into the stem
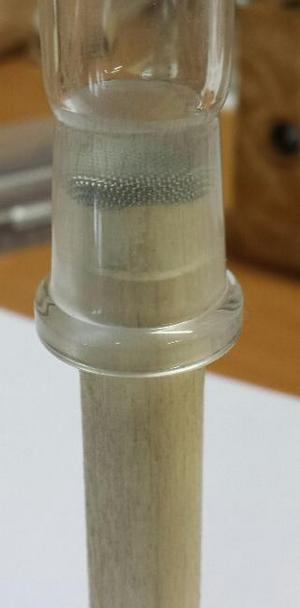
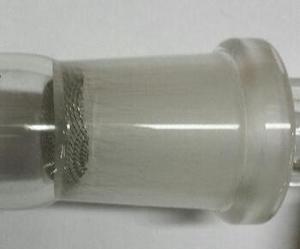
And here it is in a stem, note the male stem is also in place.
This is a 60 mesh SS screen.
I plan to send some "retro fit" kits to a couple testers so we can see easy it is to replace the stock screen with one of these. Also need to get some independent opinions on this before it goes into production. I've been using one and I think it is a good solution.
Here it is on a positioning dowel
Here it is getting inserted into the stem
And here it is in a stem, note the male stem is also in place.
This is a 60 mesh SS screen.
I plan to send some "retro fit" kits to a couple testers so we can see easy it is to replace the stock screen with one of these. Also need to get some independent opinions on this before it goes into production. I've been using one and I think it is a good solution.
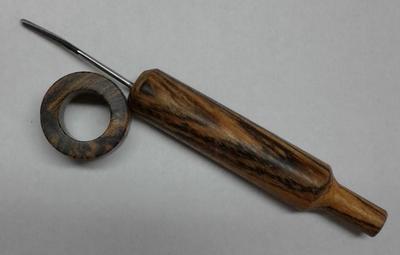
I've been using one like this for a while now.
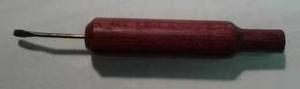
It is a stir/tamp tool. This one is dark purple heart, 2" long handle with another 1/2" of tamping tool on one end and a SS wire on the other for stirring. The wire is shaped like a spoon on the end, great for stirring or scraping out a spent stem. The tamping end is also good for positioning screens.
To make these as a good looking accessory I'm pricing them at $20.
I have other woods for these also including bolivian rosewood, bocote, tulip wood, coco bolo and leopard wood.
for anyone waiting for a Touch hang in there. I have 20 units that should be ready to ship this week. Then I have enough wood to make 50 more. Remember you can always check the list at www.mistvaporizer.com/list
I just gotta do my frickin' taxes then I can get back to work.
I just gotta do my frickin' taxes then I can get back to work.
Fat Freddy
Well-Known Member
for anyone waiting for a Touch hang in there. I have 20 units that should be ready to ship this week. Then I have enough wood to make 50 more. Remember you can always check the list at www.mistvaporizer.com/list
I just gotta do my frickin' taxes then I can get back to work.

Fat Freddy
Well-Known Member
I've been using one like this for a while now.
It is a stir/tamp tool. This one is dark purple heart, 2" long handle with another 1/2" of tamping tool on one end and a SS wire on the other for stirring. The wire is shaped like a spoon on the end, great for stirring or scraping out a spent stem. The tamping end is also good for positioning screens.
To make these as a good looking accessory I'm pricing them at $20.
I have other woods for these also including bolivian rosewood, bocote, tulip wood, coco bolo and leopard wood.
I'm down for one when they are avalable!

.
just came up with the "collar", it's a simple ring of wood that fits on a stem and lets you stir without spilling.
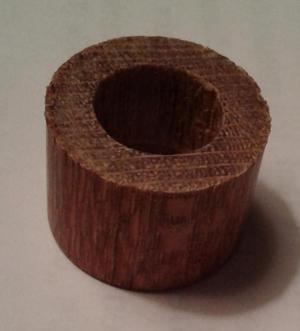
Here it is on the stem
It is a snug fit but not tight. Looking down the stem you can see there is a lot of room for stirred herb to sit without getting lost.
The top wood isn't finished, this is beta. The collar has two hole diameters. the larger one allows it to slip over the stem, the smaller one provides a ledge that sits on the stem and prevents herb from falling out. In a fully medicated state I was able to use this and not spill a crumb.
going to try and make some of these this weekend along with some stir tools.
turk
Active Member
.hey man...love my mist.vape...love the tool and this collar...will have to pick them up...set aside one each for me...wiill get both when they are ready...Monday?
http://i.imgur.com/dHcFsdz.jpg
http://i.imgur.com/dHcFsdz.jpg
Last edited:
From the MistVape Touch instruction page:
Could someone post an image of this for me so that I'm clear on this? Which way does the second screen get put in?
I'm waiting for my batteries to be delivered and I want to make sure I'm ready out of the gate when it's time to try my Touch out.
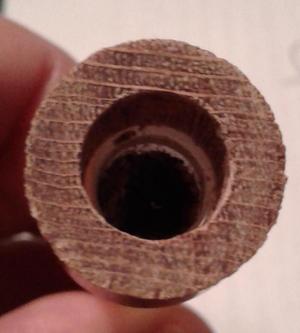
There are low profile cup screens that can be used in pairs. You insert one screen in the stem and then load the stem with herb. Once loaded you insert a second cup screen on top of the herb. Using this technique you can maximize extraction by stirring the loaded herb every so often. To stir remove the top screen with a pin or paper clip, stir the load or even remove the load and then reload. Replace the top screen and you are ready
Could someone post an image of this for me so that I'm clear on this? Which way does the second screen get put in?
I'm waiting for my batteries to be delivered and I want to make sure I'm ready out of the gate when it's time to try my Touch out.
generally flat side down and loaded like a regular cup screen. In the pic there is one screen on the bottom and one near the top. Use the stir tool to position the screens and you can pick the amount of herb you load by the distance between screens. As you become familiar with your unit you can also adjust the position in the stem, closer for more heat further up for less. You should be aware of the amount of pressure you use on the top screen because you are "packing" the herb, too hard and it is harder to draw, too loose and the heated air flows around instead of through the herb. You can use the stir tool wire to get the top screen out for adjustment. Just apply a little pressure to the sidewall of the screen and drag up. I haven't broken a stem yet but I guess you could if you are heavy handed.
I need to update the instructions to mention the stir tool.
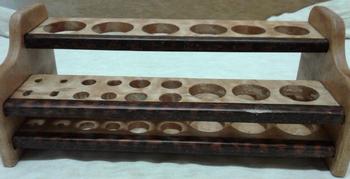
Here is my new toy
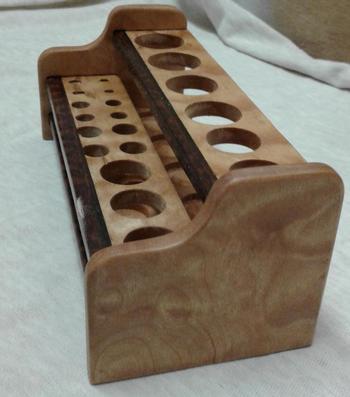
Quilted maple with snakewood trim
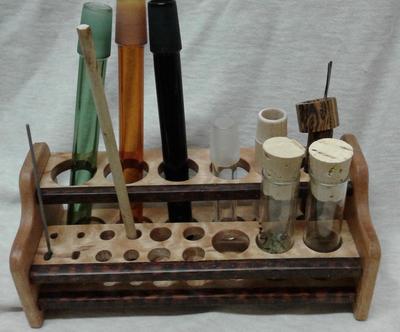
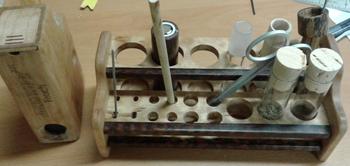
and loaded with toys
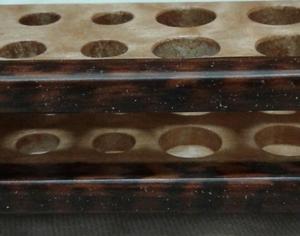
really nice snakewood
After the next batch of Touchs are done I may make more if there is interest. They measure 6 x 2.5 x 2.75"
I'm guessing they will be about $100 but since most of the time I have spent on it was design I really don't know how long it take to make.
I'm open to suggestions about the hole sizes and layout.
Quilted maple with snakewood trim
and loaded with toys
really nice snakewood
After the next batch of Touchs are done I may make more if there is interest. They measure 6 x 2.5 x 2.75"
I'm guessing they will be about $100 but since most of the time I have spent on it was design I really don't know how long it take to make.
I'm open to suggestions about the hole sizes and layout.
Finishing up more stir tools. I will have ebony, bolivian rosewood, bocote, coco bolo, leopard wood with matching collars. I have at the most 4 or each type of wood but of course can make more if needed. I will try to add these to the website today or tomorrow.
Wrapping up the glue up for the inlays on the new batch of Touch frames. I had more Kings wood than I thought so I will be able to make 4 frames with Kings wood. Hoping to be able to post pics soon.
Wrapping up the glue up for the inlays on the new batch of Touch frames. I had more Kings wood than I thought so I will be able to make 4 frames with Kings wood. Hoping to be able to post pics soon.
I did video of the latest trimmed frames. Mainly I wanted to try and show off the quilted maple and video is the way to go. I have struggled with still pictures for a long time and can't find a good way to really show of this amazing wood. Videos are the ticket.
The wood isn't finished, still needs finish sanding and polishing but it looks amazing.
The wood isn't finished, still needs finish sanding and polishing but it looks amazing.
|
Sponsored by |
|---|
|
|
|